WebGL / Tutorials / #3 Gradient
Choosing Pixel Colors
This is a follow-up to WebGL Tutorial #2 Square. We’ll start from what we built in the previous tutorial. This time we’ll draw another square but set a different color for every pixel to create a gradient.
View the demo or jump ahead and edit the code.
The next tutorial, #4 Animation, builds on this one.
Calculating color from pixel coordinates
In this tutorial we’ll use the same JavaScript setup code and only change the fragment shader. The fragment shader operates on a single pixel at a time. It knows the coordinates of that pixel and can make decisions based on the coordinates. We’ll use the coordinates to choose a color.
Pixel coordinates range from 0 to canvasWidth/Height. We’ve been setting our canvas size to 500×500, so 250 is
the halfway point. We can choose a different color for the left and right half of our canvas with this
main() function in the fragment shader:
    void main() {
      if (gl_FragCoord.x < 250.) {
        fragColor = vec4(1, 0, 0, 1); // red
      } else {
        fragColor = vec4(0, 1, 0, 1); // green
      }
    }
gl_FragCoord is a predefined read-only variable with the current pixel’s position.
We check if the x-coordinate is less than the halfway point of our canvas and set the color
to either red or green via the RGBA fragColor output.
We had to compare the x-coordinate gl_FragCoord.x to 250. (a floating point number)
rather than 250 (an integer). The GLSL language has strict static typing and only allows comparison of integers to other integers
and floats to floats (and you can convert between the types as needed). The vec4() vector constructor is setup
to allow either ints or floats as arguments. Vectors always store their values as floating point numbers though,
so gl_FragCoord.x is a float and we need to compare it to a float. The shader will fail to compile if you compare it
to 250. Try it and watch the console for the error message. Be prepared to see this error a lot, so learn to
recognize it.
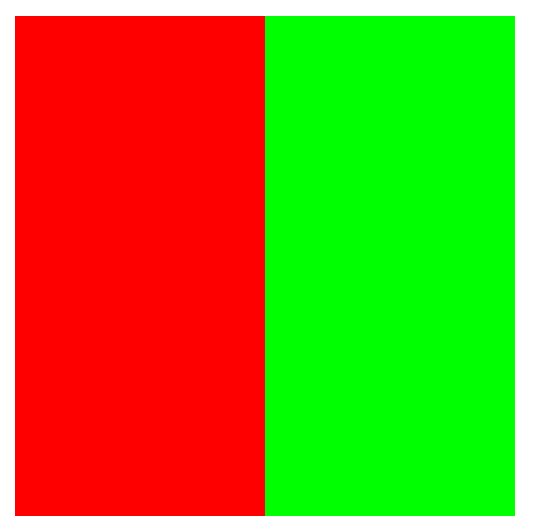
The new shader code renders this:
Custom shader inputs
A major downside to what we’ve done so far is the shader needs to know the canvas dimensions to know that 250. is the halfway point.
We want to make our shaders work for any canvas size. To do that, we can pass the canvas size into the shader from our
JavaScript setup code and calculate the halfway point in the shader.
This type of input to the shader is called a uniform, because it is uniform (the same) across all calls to both shaders’
main() functions, regardless of which vertex or pixel is being processed. It’s
effectively a global constant we can set for our WebGL program.
Here’s how we pass in the canvas dimensions via a uniform. We can call this any time after the WebGL program is created,
before we call gl.drawArrays(...);.
I put this immediately before gl.drawArrays(...):
      const canvasSizeUniform = gl.getUniformLocation(program, 'canvasSize');
      gl.uniform2f(canvasSizeUniform, canvas.width, canvas.height);
gl.getUniformLocation(program, 'canvasSize') creates a uniform input in the shader called
'canvasSize'. gl.uniform2f(...) defines the uniform as a 2-element floating point
vector, in other words a vec2. The first parameter is the uniforms location (name) and the remaining arguments are
the vector’s values that we’re passing in.
We then use that data in our fragment shader as follows. You should see the same square with the left half red and the right half green that we had above.
    uniform vec2 canvasSize;
    out vec4 fragColor;

    void main() {
      if (gl_FragCoord.x/canvasSize.x < 0.5) {
        fragColor = vec4(1, 0, 0, 1);
      } else {
        fragColor = vec4(0, 1, 0, 1);
      }
    }
First we declare the uniform vec2 canvasSize; input outside of the main()
function. The name needs to match the one from gl.getUniformLocation(program, 'canvasSize').
Then we can use canvasSize.x and canvasSize.y to get our canvas width and height. The shader doesn’t know
what our vec2 represents, so as usual with vectors we access the first value with .x and the second with .y.
By dividing gl_FragCoord.x/canvasSize.x we convert our pixel coordinate from the range [0,canvasWidth] to [0,1].
These coordinate will range from 0 to 1 no matter how big the canvas is, and our halfway point will always be 0.5.
Making a gradient
Instead of using a binary if/else condition, we can use our “normalized” coordinate range from 0 to 1 and map it directly to the RGBA values, which also go from 0 to 1:
    void main() {
       fragColor = vec4(gl_FragCoord.x/canvasSize.x, 0, 0, 1);
    }
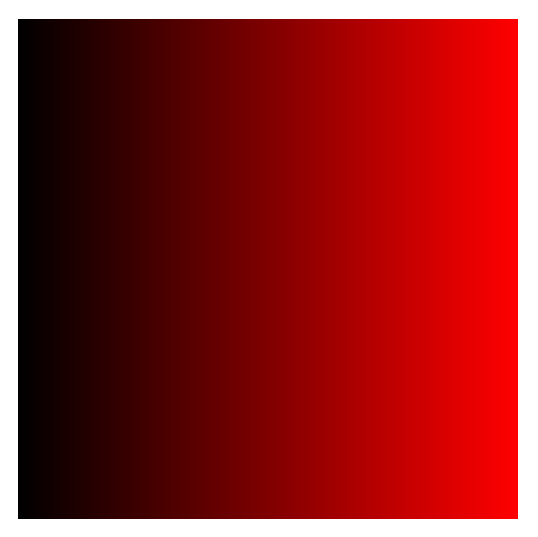
This fragment shader transitions from black
vec4(0,0,0,1) to red vec4(1,0,0,1) as we
move from left (0) to right (1) across the x-axis:
Let’s make it more colorful. We can store our normalized coordinates in a dedicated variable to make things easier:
vec2 coord = vec2(gl_FragCoord.x/canvasSize.x, gl_FragCoord.y/canvasSize.y);
There’s a shorter way to write that
vec2 coord = gl_FragCoord.xy/canvasSize.xy;
Now we can write vec4(gl_FragCoord.x/canvasSize.x, 0, 0, 1); as
vec4(coord.x, 0, 0, 1);, and it’s easier to play around with the green and blue
values:
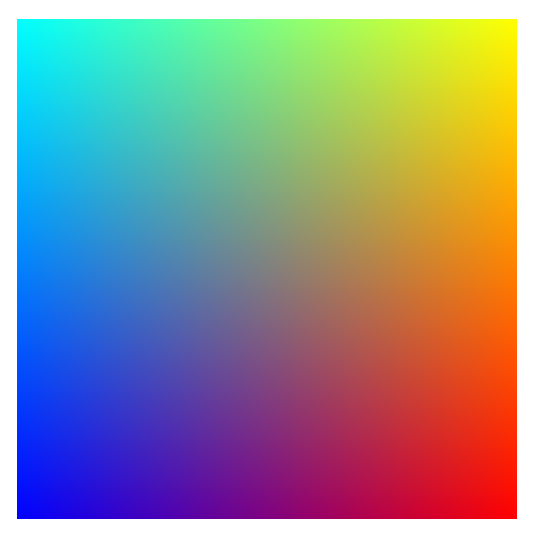
fragColor = vec4(coord.x, coord.y, 1.-coord.x, 1);
That code goes from 0% red to 100% red from left to right, 0% green to 100% green from bottom to top, and
0% blue to 100% blue from right to left (note we had to use the float 1. to substract).
In other words, blue in the lower left, red in the lower right, and green up top.
Result
Here’s the full HTML page with code. Changes to the previous tutorial are highlighted.
  <!DOCTYPE html>
  <html>
  <body>
    <canvas id="canvas" width="500" height="500"></canvas>

    <script id="vertex" type="x-shader/x-vertex">
      #version 300 es

      in vec4 vertexPosition;

      void main() {
        gl_Position = vertexPosition;
      }
    </script>

    <script id="fragment" type="x-shader/x-fragment">
      #version 300 es
      precision highp float;

      uniform vec2 canvasSize;
      out vec4 fragColor;

      void main() {
        vec2 coord = gl_FragCoord.xy/canvasSize.xy;
        fragColor = vec4(coord.x, coord.y, 1.-coord.x, 1);
      }
    </script>

    <script>
      const canvas = document.getElementById("canvas");
      const vertexCode = document.getElementById("vertex").textContent;
      const fragmentCode = document.getElementById("fragment").textContent;

      const gl = canvas.getContext("webgl2");
      if (!gl) throw "WebGL2 not supported";

      function createShader(shaderType, sourceCode) {
        const shader = gl.createShader(shaderType);
        gl.shaderSource(shader, sourceCode.trim());
        gl.compileShader(shader);
        if (!gl.getShaderParameter(shader, gl.COMPILE_STATUS)) {
          throw gl.getShaderInfoLog(shader);
        }
        return shader;
      }

      const program = gl.createProgram();
      gl.attachShader(program, createShader(gl.VERTEX_SHADER, vertexCode));
      gl.attachShader(program, createShader(gl.FRAGMENT_SHADER, fragmentCode));
      gl.linkProgram(program);
      if (!gl.getProgramParameter(program, gl.LINK_STATUS)) {
        throw gl.getProgramInfoLog(program);
      }
      gl.useProgram(program);

      const vertices = [
        [-1, -1],
        [1, -1],
        [-1, 1],
        [1, 1],
      ];
      const vertexData = new Float32Array(vertices.flat());
      gl.bindBuffer(gl.ARRAY_BUFFER, gl.createBuffer());
      gl.bufferData(gl.ARRAY_BUFFER, vertexData, gl.STATIC_DRAW);

      const vertexPosition = gl.getAttribLocation(program, "vertexPosition");
      gl.enableVertexAttribArray(vertexPosition);
      gl.vertexAttribPointer(vertexPosition, 2, gl.FLOAT, false, 0, 0);

      const canvasSizeUniform = gl.getUniformLocation(program, 'canvasSize');
      gl.uniform2f(canvasSizeUniform, canvas.width, canvas.height);

      gl.drawArrays(gl.TRIANGLE_STRIP, 0, vertices.length);
    </script>
  </body>
  </html>
Go to the next tutorial, #4 Animation.